
Making soap at home is one of the few handmade gifts that’s cheap, useful, and looks fancier than it is. DIYing soap is easier than most people think. As long as you choose the right method for you before going all out and buying everything..
The method that is going to work for you comes before choosing a recipe. Melt-and-pour soap is ready the day you make it and doesn’t use lye.
Cold process soap is made from scratch, uses lye, and needs four to six weeks of curing before it is ready to use or give as gifts. Cold process soaps need to be started weeks before they are due, or you’ll have to include the caveat “you’ll have to wait a couple of weeks before you use it”.
This guide gives you a simple way to choose your method, the ingredients and tools you need, the basic steps for each method, a gift timeline you can plan around, and a great tutorial per method so you do not have to sift through hundreds.
Every tutorial we recommend was read in full and checked for clear safety instructions and weight-based measurements.
Which Soap Making Method Is Right for You?


For your first time making soap, either as a gift or for yourself, it’s best to start simple with melt-and-pour. Cold process is good only if you can wait four to six weeks. Hot process is a later step, once cold process feels comfortable.
| Melt-and-pour | Cold process | Hot process | |
| Difficulty | Beginner | Beginner to intermediate | Intermediate |
| Handles lye? | No, the base is pre-made | Yes | Yes |
| Ready to use | The next day (sets overnight) | After a 4-6 week cure | Usable once cooled, but harder and milder after a few weeks of drying |
| Customization | Colors, scents, shapes, and add-ins; the base ingredients are fixed | Full control of oils, colors and swirls | Full control of oils; a more rustic look |
| Best for | First gifts and last-minute gifts | Gifts planned weeks ahead, and the “I made this from scratch” moment | Soapers who already know cold process |
The verdict: first time? Melt-and-pour. Want to say “I made this from scratch”? Cold process, but start the clock now (the gift timeline below shows exactly when).
Melt-and-pour is not cheating. The base already had lye in it, so all you have to do is add fragrances, color, and additions, plus shape it.
Some soapmakers reserve the term “soapmaking” for the from-scratch methods, and that is a fair opinion, but it should not stop a beginner from making a lovely gift in an afternoon.
Cold process is not a better gift, just a more demanding one.
Making Soap at Home: What You Need
You can start with a handful of ingredients and kitchen tools; however, for cold process soap making, you will need a separate set of tools.
The list below splits what you need by method, and then covers the safety rules that apply to both.
Core Ingredients

Image Credit: Soap Cafe Malta
Melt-and-pour soap
- Soap base: goat milk, shea butter, oatmeal, or clear glycerin. Goat milk and shea butter melt easily and are forgiving for beginners.
- Soap-safe fragrance oil (or soap-safe essential oil): a common rate is about 3% of the base weight; for example, 0.5 oz (14 g) of fragrance per 1 lb (454 g) of base, as CandleScience’s tutorial uses. For essential oils, check the supplier’s recommended usage rate and IFRA certificate.
- Soap dye or colorant made for soap.
- Optional add-ins: oats, dried calendula petals or a small amount of oil. But too much honey or oil can leave the bar soft and dried lavender buds have a habit of turning brown over time.
- Rubbing alcohol in a spray bottle to pop surface bubbles.
Cold process soap
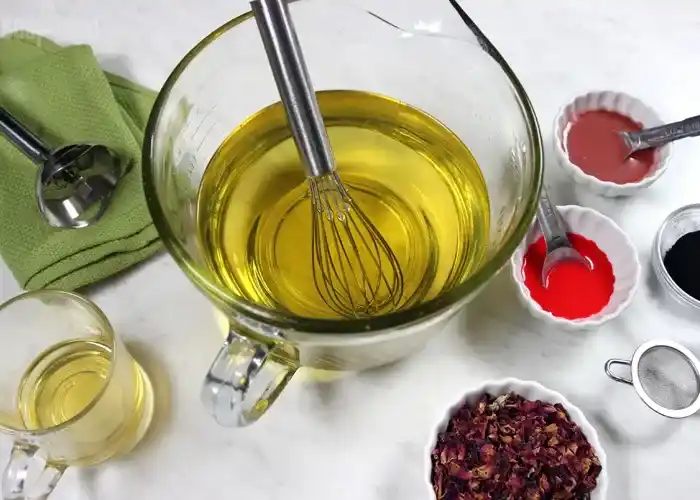
Image Credit: Artisan Suds
- Oils and butters: a beginner recipe typically blends three, such as olive, coconut and one more (palm, shea or castor). Each oil needs its own amount of lye, so never swap oils without recalculating.
- Lye (sodium hydroxide): sold by soap suppliers
- Distilled water for the lye solution.
- Fragrance and color are optional. Heart’s Content Farmhouse recommends skipping both on your first batch.
Soap needs lye, oil and a liquid. If you leave out the lye, you only have a pot of oil, which is why melt-and-pour is the way to get soap without handling lye yourself.
Essential Tools
For both methods
- Digital kitchen scale that reads in grams and ounces. Soap recipes are measured by weight, never by cups or spoons.
- Heat-safe containers: tempered glass, stainless steel or heat-safe plastic.
- Silicone spatula and a thermometer.
- Molds: silicone molds release bars cleanly and need no lining.
- Safety gear: goggles, gloves, and long sleeves.
Extra for melt-and-pour: a sharp knife and cutting board, a microwave or double boiler, and a spray bottle for rubbing alcohol.
Extra for cold process: a stick (immersion) blender, a stainless steel pot, a loaf mold (silicone, or a box lined with freezer paper) and a long plastic or wooden spoon.
Keep a dedicated soap pot and spatula if you can, and never use a regular blender or food processor, because a caustic batter splashing around is dangerous.
Safety Basics (Non-Negotiable)
- Add lye to water, never water to lye. Pouring water onto lye can erupt.
- Dress for it. Wear goggles, gloves, and long sleeves, and mix lye outside or by an open window because the fumes are strong.
- Keep aluminum away from lye. It reacts with lye to give off hydrogen gas and a lot of heat, so use only stainless steel, tempered glass or heat-safe plastic.
- Keep children and pets out of the room. Store lye out of reach, and label any lye solution cooling on the counter.
- If lye or lye water touches skin, flush with plenty of cold water and seek medical help for eyes or any burn. Use vinegar only to wipe up spills on hard surfaces.
- Always weigh ingredients and use a tested recipe or a lye calculator for any recipe you change.
- Hot melted soap burns too. Melt in short bursts and do not overheat the base.
- Use only skin-safe fragrance and colorants. Candle fragrances and craft dyes are not made for skin.
How to Make Soap at Home: The Basic Process
These are the outlines, not full recipes. Use them to know what to expect, then follow a complete tutorial (see the picks below) for exact amounts.
Melt-and-Pour Soap in 5 Steps

- Prep and cut. Wash and dry your mold and tools. Cut the base into roughly 1-inch (2.5 cm) cubes and weigh it.
- Melt gently. Microwave in short bursts of 20 to 30 seconds, stirring between each, or use a double boiler on medium-low heat. Keep the base under about 160°F (71°C). If it starts to foam, it is too hot.
- Add color and scent. Stir in soap dye a few drops at a time. When the base is around 140 to 150°F (60 to 65°C), stir in your pre-weighed fragrance.
- Pour and pop the bubbles. Pour slowly into the mold, then spritz the surface lightly with rubbing alcohol.
- Set, unmold and wrap. Leave the soap undisturbed overnight, then pop it out. Wrap bars tightly, because glycerin pulls moisture from the air and can make the surface bead with water.
Cold Process Soap in 7 Steps

- Suit up and set up. Put on goggles, gloves and long sleeves, clear the space of children and pets, and prepare your mold.
- Weigh everything. Weigh the oils, lye and distilled water separately, from a tested recipe or a lye calculator.
- Make the lye solution. Add the lye to the water, never the reverse, and stir until it dissolves. It heats up and fumes, so do this outside or by an open window, then set it somewhere safe to cool.
- Melt the oils. Melt the solid oils and butters gently, add the liquid oils, and let both mixtures cool to the temperatures your recipe calls for (commonly somewhere between 90°F and 130°F, or 32 to 54°C).
- Combine and blend to trace. Pour the lye solution into the oils and blend with a stick blender in short bursts until the batter thickens to a light pudding and leaves a trail on the surface. That is “trace.”
- Pour and wait 24 hours. Pour into the mold, then unmold and cut into bars once the loaf is firm.
- Cure for 4 to 6 weeks. Space the bars out in a dry, ventilated spot. Curing lets excess water evaporate, which makes the bar harder, longer-lasting and milder on skin. Do not skip it.
What about hot process? It is cold process cooked (usually in a crock pot) until the soap is fully made, so it can be used sooner. It assumes you already know cold process, so learn that first.
The Gift Timeline: What You Can Still Make Before the Holidays
For Christmas gifts, a cold process batch must be in the mold by about November 13 to get a full six-week cure, and by November 27 at the very latest for four weeks. Melt-and-pour can wait until around December 22.
Each bar runs from today to the last day you can start that method.
- Same day or this week: melt-and-pour. It sets overnight and is ready to use the next day. Allow one day to set and one to wrap.
- Four to six weeks ahead: cold process. Rushed from-scratch soap is soft and harsh, so count back from the gift date before you buy supplies.
- Another gift date? Count back six weeks for cold process, or two days for melt-and-pour. For Mother’s Day, a birthday or next year’s holidays, the same math applies.
Missed the cold process window? Make melt-and-pour now, and start a cold process batch for the next occasion.
The Best Soap Making Tutorials for Beginners (One Pick per Method)
There are thousands of soap tutorials, but it seems that some skip safety steps or exist mainly to sell you a kit. We’ve picked one tutorial for each method: the one we would hand to a friend who has never made soap before.
Best Melt-and-Pour Tutorial: CandleScience
- Tutorial: How to Make Homemade Soaps with Melt and Pour Soap Base
- From: CandleScience, a candle and soap supplier
- Format: video with a written version
- Level and time: beginner; about 45 minutes of work, then it sets overnight
- Lye: none
Our verdict: this is the safest melt-and-pour starting point we found. It weighs the soap base and the fragrance, tells you to melt in short bursts so you do not overheat the base, and says to use only soap-safe fragrance oils and to check the usage rate and IFRA certificate for essential oils.
Heads-up: the written version makes 8 bars at about 3% fragrance, while the video makes 6 bars at about 4%. Follow the written weights. CandleScience sells the supplies it uses, so some links are commercial.
Best Cold Process Tutorial: Heart’s Content Farmhouse
- Tutorial: How to Start Soap Making
- From: Katie Shaw, Heart’s Content Farmhouse (page updated July 2026)
- Format: written guide with a recipe card
- Level and time: beginner-friendly but it needs your full attention; about 45 minutes of prep, 24 hours in the mold, then a cure
- Lye: yes
Our verdict: the best entry point to from-scratch soap we found. It explains why lye is needed and covers goggles, gloves, long sleeves and ventilation. It gives the lye-to-water rule (“snow floats on the lake”), rules out regular blenders and food processors, and insists on weighing everything. The first recipe uses three common oils and tells you to skip fancy designs on batch one.
Heads-up: the recipe says to cure for at least three weeks, but plan on four to six. It also uses palm oil, and swapping any oil means recalculating the lye in a lye calculator. The page includes affiliate links for tools.
Hot Process
Hot process builds on cold process skills, so we are not recommending a tutorial yet. Start with the cold process pick above.
How We Judged These
Every tutorial had to pass four tests:
- Clear safety instructions for lye and heat.
- Ingredients measured by weight, not volume.
- Ingredients and tools listed up front.
- Steps a first-timer can follow without extra research.
We read each tutorial in full and rejected any with unsafe advice, such as tasting a bit of uncured soap to test it. Details such as yields and cure times change, so check the pages before you start.
Turning Soap Into a Gift: Packaging and Presentation
Good packaging turns a plain bar into a handmade gift. Wrap melt-and-pour soap straight away, and let cold process bars finish curing before you wrap them.


- Wrap it right. Melt-and-pour soap attracts moisture, so wrap it tightly in plastic wrap or food-service film as soon as it is unmolded. Cured cold process bars do better in paper, fabric or a cigar-style band that lets them breathe.
- Dress it up. Kraft paper and twine, a small kraft box, a printed paper band or a fabric scrap all look good with almost no cost.
- Make a set. Two or three mini bars in different scents, or a bar with a washcloth and a draining soap dish, feels like a complete gift.
- Label it. Include the soap’s name, the ingredients (important for allergies to nuts, goat milk or fragrance), the weight and the date you made it. For cold process, add the date it is ready to use.
- Add care instructions. A short note to keep the bar dry between uses helps it last.
This post covers gifting. If you ever sell soap, rules on labeling, weight statements and health claims vary by country, so check your local regulations first.
Common Beginner Mistakes
Most first-batch failures come from the same few habits.
- Rushing the cure. Cold process soap given away after a week or two is softer and harsher than it should be. Plan for four to six weeks.
- Measuring by volume. Cups and spoons do not work for soap. Weigh every ingredient on a digital scale.
- Overheating melt-and-pour. Too much heat makes the soap rubbery, foamy or burnt-smelling. Melt in short bursts and stir.
- Swapping oils without recalculating. Each oil needs its own amount of lye, so run any change through a lye calculator.
- Skipping the safety gear or working while distracted. Goggles, gloves and long sleeves go on first, and children and pets stay out of the room.
- Adding too much fragrance, or the wrong kind. Use skin-safe fragrance at the recommended rate, and skip scent entirely on a first cold process batch.
- Going fancy too soon. Make one plain batch before you try layers, swirls or embeds.
Making Soap at Home: Frequently Asked Questions
Melt-and-pour soap. Melt a ready-made base, add color and scent, pour it into a mold, and let it set overnight. No lye and no cure time, so it’s perfect for last-minute gifts. A goat milk or shea butter base is the most forgiving choice for a first batch.
You can make soap without handling lye by using a melt-and-pour soap base, which the manufacturer already made with lye. True from-scratch soap always needs lye, because the reaction between lye and oil is what makes soap. If you leave the lye out, you only have a pot of oil.
Four to six weeks. After 24 hours in the mold, you unmold and cut the soap, but it still holds extra water. Curing lets that water evaporate, which makes the bar harder, longer-lasting and milder on skin. Some recipes say three weeks, but a longer cure is safer for gifts.
Yes, when it is made correctly. In properly made cold process soap, the lye is used up in the reaction, so none is left in the finished bar. The risks come from wrong measurements, which can leave a harsh bar, and from fragrance or ingredients you react to. Use a tested recipe, weigh everything and cure fully.
Most bars stay usable for roughly a year or two if kept dry, but this depends on your recipe. Over time, the scent fades, and oils can turn rancid, which shows as an off smell or orange spots.
For gifts, aim to use it within a year. Keep soap out of standing water so it lasts longer.
Not at first. Starter supplies such as a scale, molds, safety gear and a first batch of ingredients cost more than a few bars from the store.
But per bar, homemade soap gets cheaper as you reuse tools and buy ingredients in larger amounts. Most people make soap for the gift value and control over ingredients, not to save money.
Your First Batch of Handmade Soap Gifts
Choose your method by deadline and confidence. If the gift is due in under four weeks, or you want to avoid lye entirely, make melt-and-pour. If you have four to six weeks and want to say you made it from scratch, start with the cold process pick and a plain three-oil recipe.
Either way, weigh everything, wear your safety gear and keep the first batch simple. A plain bar wrapped in kraft paper and twine makes a good handmade gift, and the second batch is always easier than the first.
Ready to start? Pick your method from the comparison table, check the gift timeline for your deadline, and open the tutorial for the method you chose.
Sources and Further Reading
- CandleScience: How to Make Homemade Soaps with Melt and Pour Soap Base
- CandleScience: Melt and Pour Soap Making for Beginners
- Heart’s Content Farmhouse: How to Start Soap Making
- Soap Deli News: How to Make Soap from Scratch
- Soap Queen: Back to Basics series, a free lye-safety-first learning path for cold process
- The 104 Homestead: How to Make Melt and Pour Soap